SUSE CaaS (Container-as-a-Service) Platform 2.0
Author : Ananda Kammampati
< ananda at fieldday dot io >

Start Here

The primary focus of this article is to explain the pre-requisites that are needed in doing a successful installation and configuration of SUSE CaaS Platform 2.0 using PXE, specifically using a CentOS7 as the PXE Server. In my case, I have built it on a single host runing VMware ESXi 6.5 U1 hypervisor.
This article is NOT about teaching SUSE CaaS Platform. Please check out the links that I have listed under References section that cover many important aspects of the platform, which I am not covering here.
As per SUSE’s documentation, PXE setup can be done using Autoyast on SUSE Linux Server. Since I am not familiar with Autoyast, I have done to the best of my knowledge to provide the same equivalent using a CentOS7 VM instead (no offense SUSE). What I have documented here is specific to my own setup, and is in no way blessed/endorsed by SUSE or CentOS or VMware. So there goes my disclaimer 🙂
The Deployment Guide of SUSE CaaSP 2.0 platform provides the following diagram, detailing all the services on different nodes that make up the entire platform.

And here is my architectural setup diagram:

Detailed roles on each virtual machine is as follows:
1 x EDGE VM running EFW distribution, configured as network gateway
1 x DNS VM - CentOS7 VM running FreeIPA for DNS service
1 x LB VM - CentOS7 VM running HAProxy for Load Balancer for Master Nodes.
1 x JUMPBOX VM - CentOS7 VM where you log in that has visibility to all the VMs. This is also referred to as the Bastion host. This article primarily focuses on how to configure services namely HTTP Server, TFTP Server and DHCP Server on this particular virtual machine. These services are pre-requisite services that need to be in place, for a successful PXE installation of SUSE CaaSP 2.0 platform. Also, note that there are other ways of doing the installation (like directly attaching SUSE CaaSP ISO file to every individual VM). This is just one way that I figured out and made it to work.
1 x ADMIN NODE VM – Run services namely Velum (Administrator UI), MariaDB, Salt API, Salt master, Salt minion, etcd discovery
3 x MASTER NODE VMs – Run services namely Salt minion, etcd, flanneld, API server, Scheduler, Controller, Container Engine (docker daemon)
10 x WORKER NODE VMs – Run services namely Salt minion, etcd-proxy, flanneld, kubelet, kube-proxy, Container engine (docker daemon) and containers to run applications / workloads.
Configurations of all the virtual machines defined in the DNS server (domain name: susecaas.local ) are as follows:


I have got a fully loaded Super Micro SYS-E200-8D server with 128GB RAM and 1 TB SSD. Isn't that cool 🙂

Listing of all 18 virtual machines that make up the platform :

Let’s get started with configuring the JUMPBOX VM which I cover in detail, in section 01, 02 and 03. As I have mentioned before, this article’s primary focus is in configuring the pre-requisites (Web Server, TFTP Server and DHCP Server). Once that is done, rest of the sections are straight forward as most of it is automated.
Section #01: Configuring Web Server on JUMPBOX VM (CentOS 7)
Section #02: Configuring TFTP Server on JUMPBOX VM (CentOS 7)
Section #03: Configuring DHCP Server on JUMPBOX VM (CentOS 7)
Section #04: PXE booting ADMIN Node
Section #05: Initial Configuration of ADMIN Node
Section #06: PXE booting of MASTER Nodes
Section #07: PXE booting of WORKER Nodes
Section #08: Initial Configuration of 3 MASTER and 2 WORKER Nodes
Section #09: Additional Configuration of 8 more WORKER Nodes
Section #10: Sanity checking from JUMPBOX VM
Conclusion:
References:
Section #01: Configuring Web server on JUMPBOX VM
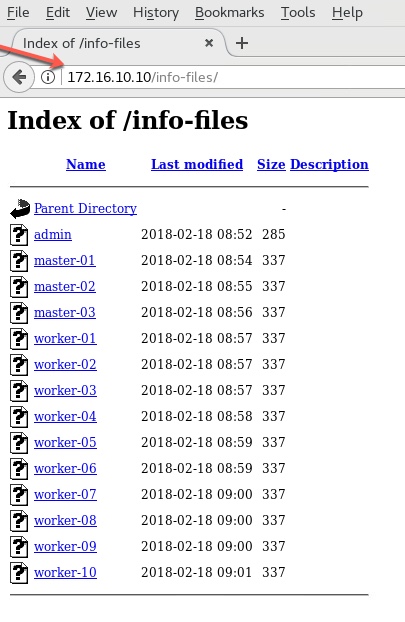
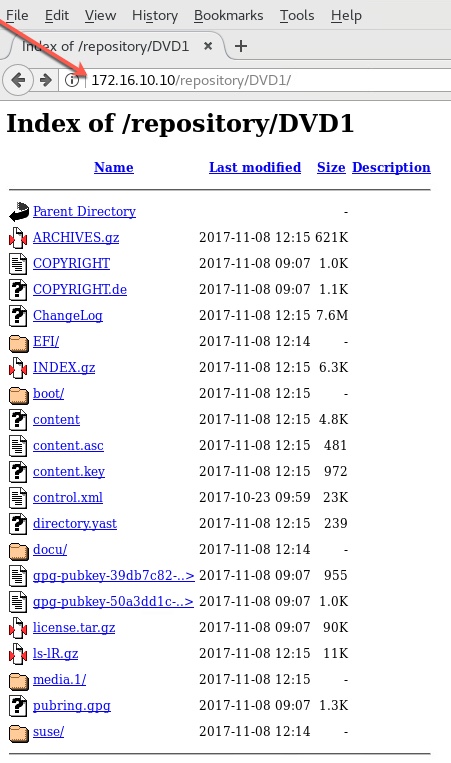
First, I install and configure Apache Web Server onto the JUMPBOX VM. This will act as the repository. To begin with, I downloaded SUSE CaaSP-2.0 platform's DVD1 from SUSE's website (60 days Eval copy), upload it to the local Datastore, and then connect the iso file to the CDROM on JUMPBOX VM. Once the VM powered is on, I then copy the contents from CDROM onto a sub-directory of the document root of Apache web server. I then create multiple 'info-files', one for each virtual machine.These info-files contain information namely hostname, static ip address, netmask, nameserver, gateway address and domain name per virtual machine. These 'info-files' will then be passed as parameters (via Web Server) to linux kernel while doing PXE installation. Please pay attention in Section #2 where I explain how I am using these info-files.
Refer to the commands, videos and screenshots listed below:
![]()
Commands
![]()
![]()
![]()
![]()
![]()
![]()
![]()
![]()
![]()
![]()
![]()
![]()
![]()
Section #02: Configuring TFTP server on JUMPBOX VM
Now that the web server is configured as the repository, I will go ahead and configure the TFTP server on the same JUMPBOX VM. I first look for an RPM file named tftpboot-installation-CAASP-2.0-x86_64-14.320-1.35.noarch.rpm in the directory where DVD1 is mounted. In my case, it is located at /run/media/student/SUSE-CaaS-Platform-2.0-DVD-x86_6/suse/noarch directory (student being the user account). Once I install that package, all the files from that package will go into /srv/tftpboot directory. I will then create a file name 'default' that provides the PXE menu at VM(s) boot up time. It is in this 'default' file, I will use all the 'info-files' that I created in Section #1.
And finally, I made an entry in the crontab file to restart the TFTP server, if this JUMBOX VM ever gets rebooted. I have to do this step as a workaround as I couldn't figure out for the life of me as how to auto-restart the TFTP server. (Yes, I tried with xinetd, systemctl but no luck)
Refer to the commands, videos and screenshots listed below:
![]()
Commands
![]()
![]()
![]()
![]()
![]()
![]()
![]()
![]()
![]()
![]()
![]()
![]()
![]()
Section #03: Configuring DHCP server on JUMPBOX VM
This section is probably the trickiest part to understand (I am finding it difficult to explain it in simpler manner. Let me put it that way.)
The thing that I would like to emphasize in configuring the DHCP server is the range that I have defined for the DHCP pool in the configuration file /etc/dhcp/dhcpd.conf (range 172.16.10.230 172.16.10.248). You might wonder what is the significance of this range ? To better explain this, we need to talk about how we normally follow the procedure of assigning static IP addresses in DHCP configuration file with regards to PXE installation.
A simple procedure we normally do is to hardcode in the DHCP configuration file, a 1:1 mapping between MAC addresses of servers and their corresponding static IP addresses. But the challenge with the VMware platform is that we won't get a MAC address auto-assigned unless and until we power on a VM. So how can we define an static IP address for a VM based on MAC address, when the NIC of the VM hasn't gotten a MAC address yet, at its creation time ?
So to circumvent this challenge, this is what I did in the DHCP configuration file. I gave an IP address range that is different than the static ip addresses meant to be assigned to the VMs (172.16.10.50 to ADMIN VM, 172.16.10.101-.103 for MASTER-VMs and 172.16.10.201-.210 for WORKER VMs). So the sequence of events at boot up time for all VMs go like this:
- Any VM/Node (be it ADMIN or MASTER or WORKER) when powered on and network booted, broadcasts itself asking for an IP address
- The DHCP server now doles out an IP address from the defined DHCP pool (range 172.16.10.230-.248)
- The doled out DHCP address will initially be used by the VM/Node
- With that DHCP address, the VM/Node then contacts the TFTP server, requesting for PXE boot loader file pxelinux.0 ( defined in /etc/dhcp/dhcpd.conf)
- Once pxelinux.0 gets transferred and loaded, next comes the kernel (/srv/tftpboot/CAASP-2.0-x86_64/loader/linux), the initial ram disk - initrd (/srv/tftpboot/CAASP-2.0-x86_64/loader/initrd) and its own info-file specifying the kernel parameters for that particular VM/Node.
- It is at this stage, the VM/Node now has its own STATIC IP address that is being passed as one of the parameters in it's own info-file
- Once the VM/Node has all the required bits in hand, it boots itself up and continues with the rest of PXE installation procedure
- Revisit Section#2 for the explanation for the default file (/srv/tftpboot/CAASP-2.0-x86_64/net/pxelinux.cfg/default) that plays the viral role with regards to PXE
It is important to keep in mind that the ADMIN VM/Node has to be configured first. Only then the rest of the VMs/Nodes (both Master and Workers) should be PXE booted. The reason being, the ADMIN Node has its own built-in Autoyast setup that takes care of the auto-installation process for Master and Worker VMs/Nodes (depending on which components goes to Masters and which ones go to Worker Nodes).
Note the difference between how the info-file of the ADMIN VM/Node is defined (and different) as compared to the info-files for the rest of the VMs/Nodes. The info-files for both Masters and Worker VM/Nodes will have a reference to the ADMIN node.
Refer to the commands, videos and screenshots listed below:
![]()
Commands
![]()
![]()
![]()
![]()
![]()
![]()
![]()
![]()
![]()
![]()
![]()
![]()
![]()
Section #04: PXE booting ADMIN Node
Now that we have all the pre-requites in place, let's PXE boot the ADMIN VM/Node first. Except for providing a new password for the root account and a time server, nothing else is needed. This is because all the required information about itself - its static IP address, netmask, gateway address, DNS server are all provided by its own info-file.
Refer to the videos and screenshots listed below:
![]()
No commands
![]()
![]()
![]()
![]()
![]()
![]()
![]()
![]()
![]()
![]()
![]()
![]()
![]()
Section #05: Initial Configuration of ADMIN Node
Once the ADMIN VM/Node is fully up and running, from JUMPBOX, we point the browser to the ADMIN VM/Node. We should see the Velum UI provided by the ADMIN VM/Node. We will create an administrator account first (login: admin@susecaas.local password 1FieldDay-IO). With those credentials, we will then log into the ADMIN VM/Node and complete the required steps in configuring it.
Please note that there is a section in the configuration where I have changed the default IP addresses assigned for Cluster CIDR 172.16.0.0/13 to 172.17.0.0/13. Similarly for Cluster CIDR (lower bound) 172.16.0.0 to 172.17.0.0 . This is is something specific to my own environment and you don't have to necessarily change them. You can go with the default values unless, you use the exact same IP addresses for all the virtual machines, the way that I use.
Refer to the videos and screenshots listed below:
![]()
No Commands
![]()
![]()
![]()
![]()
![]()
![]()
![]()
![]()
![]()
![]()
![]()
![]()
![]()
Section #06: PXE booting MASTER Nodes
PXE boot all the MASTER nodes. Depending on how powerful your server is, you can either PXE boot all 3 MASTERs at one go or in sequence. I have posted the screenshots of just one MASTER. The same steps apply to the other 2 MASTER VMs as well.
Refer to the videos and screenshots listed below:
![]()
No Commands
![]()
![]()
![]()
![]()
![]()
![]()
![]()
![]()
![]()
![]()
![]()
![]()
![]()
Section #07: PXE booting WORKER Nodes
PXE boot all the WORKER nodes. Again, depending on how powerful your server is, you can either PXE boot all 10 WORKERs at one go or in sequence. I have posted the screenshots of just one WORKER but the same steps apply to the other 9 WORKER VMs as well.
Refer to the videos and screenshots listed below:
![]()
No Commands
![]()
![]()
![]()
![]()
![]()
![]()
![]()
![]()
![]()
![]()
![]()
![]()
![]()
Section #08: Initial Configuration of 3 MASTER and 2 WORKER Nodes
We log into the ADMIN Node again with credentials: admin@susecaas.local / 1FieldDay-IO and do the rest of the configurations. This involves defining/adding the MASTER nodes and WORKER nodes. Based on their section, appropriate packages will be installed (refer to the Architectural diagram taken from the Deployment Guide) and corresponding docker containers will be initiated, which build up SUSE CaaSP 2.0 platform. To begin with, we will add 3 MASTER and 2 WORKER Nodes.
Refer to the videos and screenshots listed below:
![]()
No Commands
![]()
![]()
![]()
![]()
![]()
![]()
![]()
![]()
![]()
![]()
![]()
![]()
![]()
Section #09: Additional Configuration of 8 more WORKER Nodes
Similar to the previous section, we will repeat the steps but adding 8 more additional WORKER nodes. So in total, we will have 3 MASTER Nodes an 10 WORKER Nodes - all configured from the Velum UI provided by the ADMIN Node
Refer to the videos and screenshots listed below:
![]()
No Commands
![]()
![]()
![]()
![]()
![]()
![]()
![]()
![]()
![]()
![]()
![]()
![]()
![]()
Section #10: Sanity checking from JUMPBOX VM
Finally, from JUMPBOX VM, we access the admin portal (Velum UI) provided by the ADMIN Node. We first download the kubeconfig file from ADMIN node. We then download kubectl command from the internet. Using kubectl we make sure that we can reach out the SUSE CaaSP 2.0 (Kubernetes) platform successfully.
Refer to the videos and screenshots listed below:
![]()
No Commands
![]()
![]()
![]()
![]()
![]()
![]()
![]()
![]()
![]()
![]()
![]()
![]()
![]()
Conclusion:
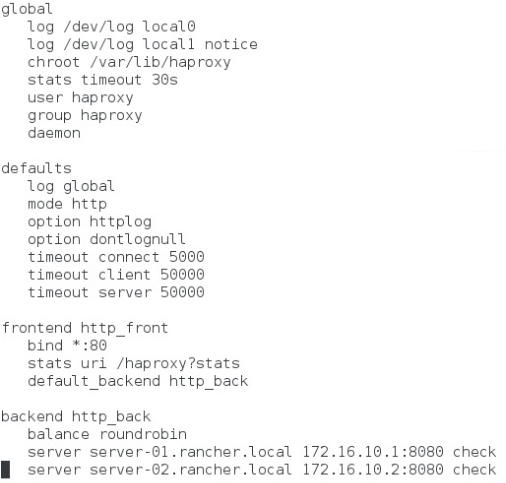
I initially started with plans on having a HA-Proxy as a Load Balancer ( LB ) in front of the 3 MASTER Nodes. But I ran into some challenges in configuring it properly. I am hoping to update this article when I am done fixing it right.
Once you have your own CaaSP 2.0 platform up and running, follow this excellent video posted by my virtual SUSE guru Rob de Canha-Knight. Definitely worth connecting with him if SUSE is your thing. He is reachable on most social channels. And he's good at responding to emails. Don't think he ever sleeps 🙂 Whatever little I knew about SUSE CaaSP 2.0 platform, I learnt it from his video alone.
I have come to my end of the road in showcasing how to build a fully distributed SUSE CaaSP 2.0 platform from scratch on VMware ESXi 6.5 U1, specifically using CentOS7 for all PXE needs.
I sincerely hope you got something useful out of this article. If I can be of any use/help, please feel free to ping me at <ananda at fieldday dot io>
Wishing you the very best. Happy SUSE CaaSP'ing 🙂
References:
Deployment Guide:
Downloads:
https://download.suse.com/index.jsp
PXE related:
http://users.suse.com/~ug/autoyast_doc/Invoking.html
http://linuxintro.org/wiki/Build_a_PXE_Deployment_Server
https://help.ubuntu.com/community/PXEInstallMultiDistro
http://users.suse.com/~ug/autoyast_doc/appendix.linuxrc.html